Siemens HB300550C Oven Dismantling and Replacement of Thermal Insulation
ID: 191807
Description:
Steps:
- Electrician required
- Switch off the Breaker (or fuse)
- Ensure the power is OFF
- Open the Door
- Tilt the safety lever forward on both left and right sides
- Pull the door forward to remove it from the brackets
- Remove these screws from the oven
- Pull out the oven and place it on the floor.
- Disconnect the electrical connection
- Screw type 1
- Screw type 2
- Screw type 3
- Disassemble the cover
- Remove the back panel
- Untwist the cable ties
- Remove the light
- Remove the green clip
- Pull the legs slightly outwards
- Remove the selector switch
- Press in from the sides
- Leave the black clip under the switch where it is.
- Remove the switch
- Remove the green clip
- Pull the legs slightly outwards
- Remove the switch
- Press in from the sides
- Leave the green support on the switch
- Remove the temperature control
- The screws have a fine (type 2) head
- Label the displays (to get them back in the correct positions)
- "Unhook" the displays
- Pull the upper latch tab upwards and pop out the display.
- Loosen the screws
- Tilt forward
- Pull out the front
- Loosen the screws from the plastic housing
- Bend the metal tabs open
- Un-thread the cable
- Then lift off the housing
- Loosen the screws
- lift off the exhaust duct
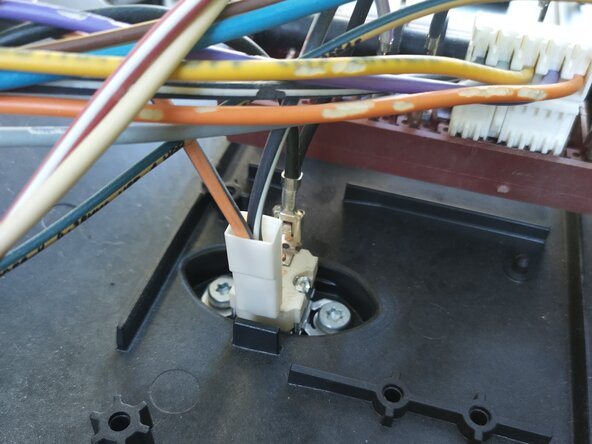
- Remove the screw
- Remove the safety fuse
- reposition all the cables to the back
- Remove the screws from the side panels
- Do this on both sides
- Tilt the side panel
- then pull the side panel upwards
- Tilt the top of the tray backward
- Pull the sheet metal away to the rear
- Detach the top heating element
- Detach the bottom heating element
- Disconnect the "ring heater" cable
- Disconnect the fan cables
- Remove the screws from the hot air baffle
- dismantle the hot air baffle
- Remove the nut on the fan 'wheel'
- Nut is LEFT-HAND threaded