Xiaomi Poco X4 Pro 5G USB C Port Replacement
ID: 193081
Description: This guide replaces the whole subboard.
Steps:
- Shutdown the device
- Remove the SIM card carriage by pushing the SIM eject tool or a bent paperclip into the SIM eject hole
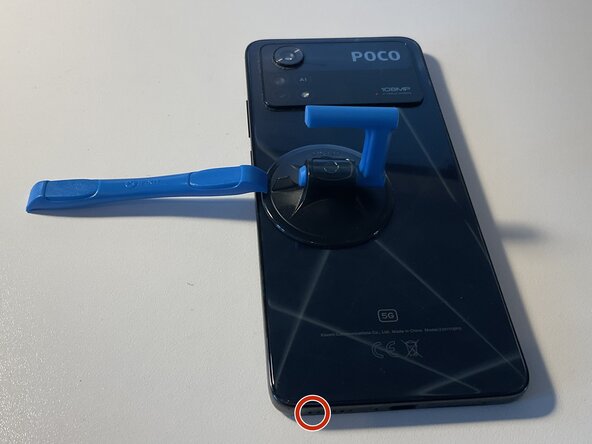
- Apply the suction cup to the left side of the back panel, slightly below the power button
- Insert the Opening Tool between the glass and the frame, orienting it as shown in the picture
- Once you are positioned between the back panel and the frame, gently work the tool counterclockwise to lift the back panel away from the adhesive. If the adhesive is too strong, carefully heat the area with a hair dryer or hot air gun, or insert the Jimmy approximately 5 mm to cut through the tape
- Once the back panel is separated, remove the remaining adhesive from both the phone and the back panel
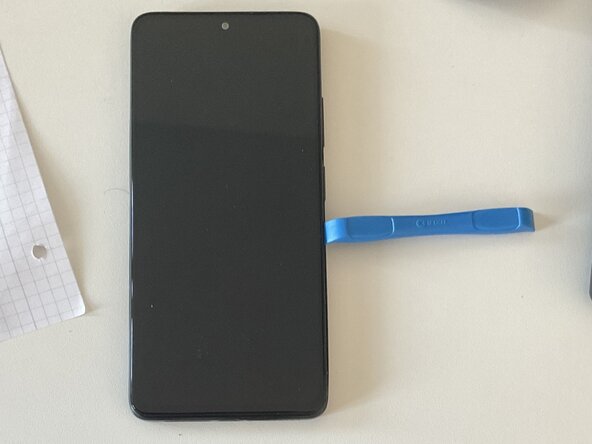
- Place the phone screen down
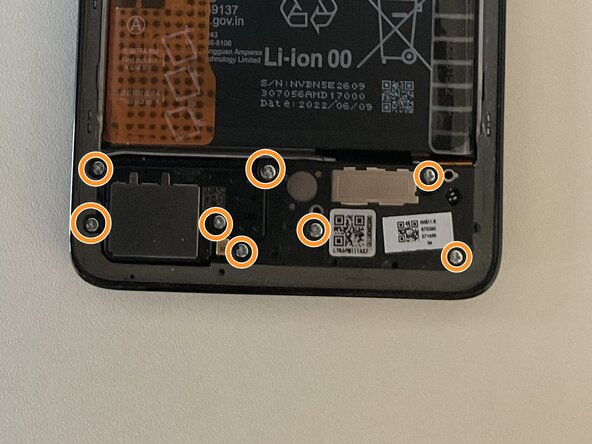
- Remove the 10 Phillips #00 screws in the top half
- Remove the 8 Phillips #00 screws in the bottom half
- One or more screws may be covered by warranty seals
- In the pictured device, the warranty seal was an orange dot on the middle screw to the right of the camera module. All screws are marked to account for variations in seal placement.
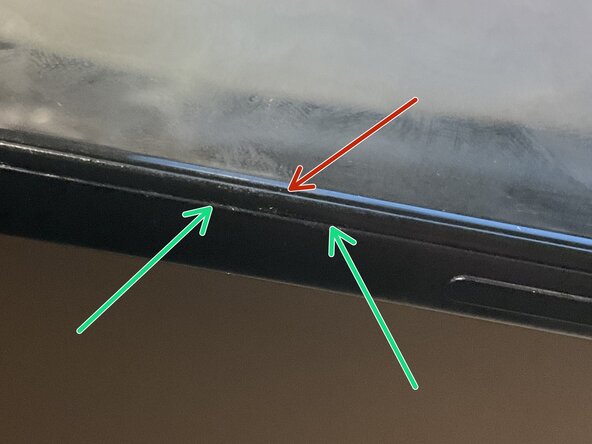
- Carefully insert the Opening Tool between the screen assembly and the frame below the power button, as indicated by the two green arrows. Do not insert the Opening tool between the glass and the plastic screen guard, as indicated by the red arrow.
- The screen is secured to the frame by multiple clips along the long sides. Work your way around in a counterclockwise direction, taking extra care near the buttons, where a ribbon cable connects them to the mainboard.
- If the clips cannot be opened using the opening tool alone, using opening picks may help.
- It helps to insert opening picks between the frame and screen assembly along the perimeter to prevent accidentally pressing the parts together and causing the clips to reengage.
- Once you have disengaged all the clips, carefully turn the frame to the left side, paying special attention to the ribbon cable connecting the buttons to the phone.
- Remove the ribbon cable that connects the buttons to the phone
- Lift it up from the right side to avoid accidentally removing or damaging the lowest camera
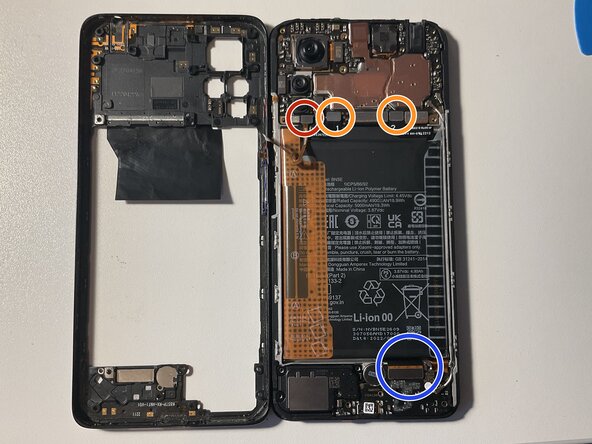
- Remove the two ribbon cables that connect to the battery
- Remove the ribbon cable that is connected to the USB subboard
- Carefully disconnect the black and white antenna cables
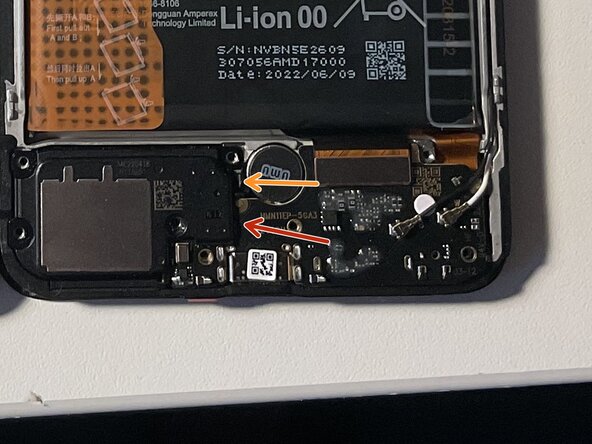
- Carefully lift the speaker with the spudger
- It might be necessary to disconnect the clip at the top right corner of the speaker
- Replace the USB subboard with the replacement part