Microsoft Surface Pro Camera Replacement
ID: 19345
Description: Use this guide to replace the front and rear...
Steps:
- Use a heated iOpener or a heat gun to heat the edges of the display and soften its adhesive.
- If you're using an iOpener it may take several cycles of reheating and applying it to soften the adhesive enough. Every time, let the iOpener sit on the display for at least a minute before reheating to allow the adhesive to soften.
- Apply a suction cup as close as possible to the edge of the display.
- Use the suction cup to lift the edge of the display enough to insert an opening pick under the edge.
- Slide the opening pick all the way around the edges of the display to cut through the adhesive on the bezel.
- Do not insert the opening pick past the bezel of the display—you may permanently damage the display.
- The bezel is much thinner on the bottom of the display, which is the side with the Windows logo. To avoid damage, don't poke too deep with the opening pick on the bottom edge.
- Ribbon cables and a circuit board are approx. 0.6 cm from the edge of the glass.
- Be very careful and move slowly during this step. The display is fragile and will crack if too much force is applied against it. If your tools seem stuck, apply more heat to further soften the adhesive.
- Starting from the top edge, lift the display slightly.
- If you feel any resistance, use heat and an opening pick to slice through any remaining adhesive.
- Before completely removing the display:
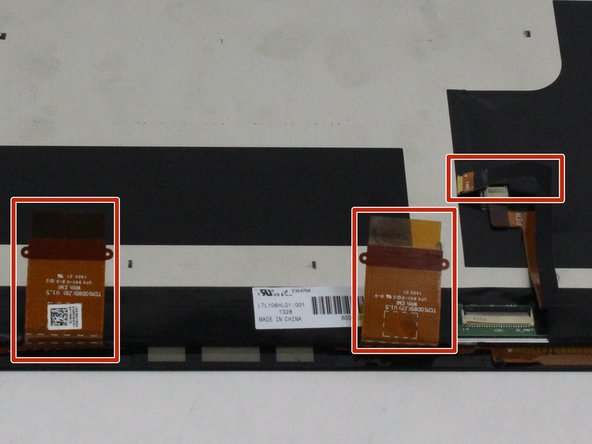
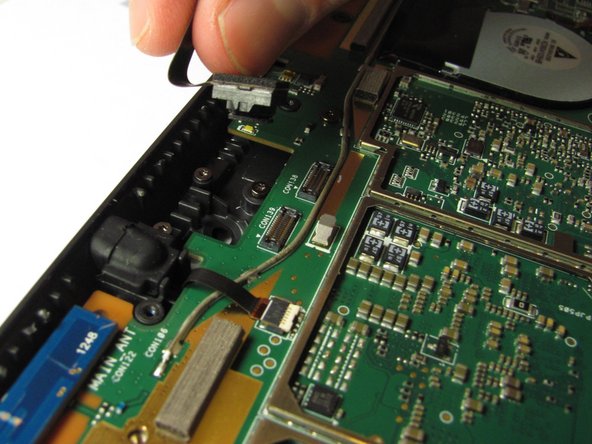
- Disconnect the three display cables.
- Gently peel from the frame 2 orange ribbon cables that are glued to it, as those should stay with the display. (e.g. use a thin plastic card to separate them)
- Remove the display.
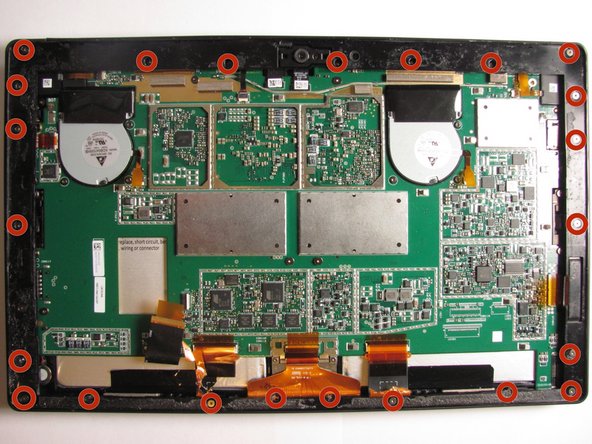
- Using a T5 Torx screwdriver, unscrew a total number of 23 screws located on the outside panel of the Surface Pro.
- Use the plastic opening tool or fingers to pry out the front camera.
- Lift the outside panel from the Surface Pro.
- Use the plastic opening tool to pry out the back camera.