Nortel Millennium Provisioning Setup Guide
ID: 193656
Description: This guide is for provisioning and setting up...
Steps:
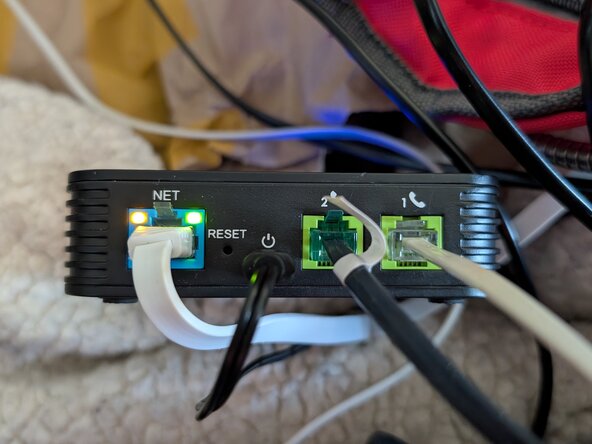
- Connect your Nortel Millennium to Port 1 on the Grandstream.
- Connect your USB Modem to Port 2 on the Grandstream and plug in the USB end to your computer of choice.
- Temporarily unplug the modem in Port 2 and plug in another landline phone.
- On the phone, dial ***. Once you hear "Enter a menu option", type 02. Enter the IP it gives you into your browser.
- Make sure you are on the same network as the Grandstream. Additionally, not all phones allow you to dial ***.
- Under Port 1, enter the details for your VoIP provider.
- Next, go to Port Settings > FXS Port 1 > Analog Signal Line Configuration and enable Polarity Reversal & disable Line Echo Canceller.
- Additionally, set Jitter Buffer Type to "Fixed" and Jitter Buffer Length to "Low" or "Medium".
- Note the Port number for Port 2 from the Port Status screen (usually 6060). This number can change when making changes but rebooting the ATA will set it back to 6060.
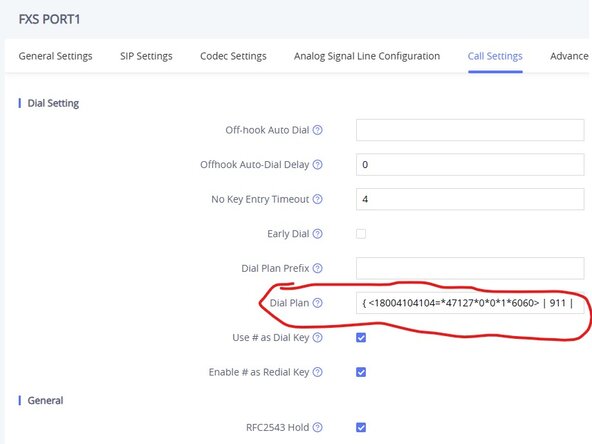
- Now go to Port Settings > FXS Port 1 > Call Settings. Under Dial Plan, enter the following: { <18004104104=*47127*0*0*1*6060> | 911 | 411 | 611 | 988 | 1xxxxxxxxxx | [2-9]xxxxxxxxx | 011x+ | x+ | \+x+ | *x+ | *xx*x+ } (This assumes you're using 1-800-410-4104 as your manager number, you can change this)
- The dial plan will route all calls for 1-800-410-4104 to FXS Port 2, which is your USB modem. This allows the Millennium to talk with mm_manager.
- Download mm_manager from this link and compile it using the provided instructions.
- Next, find the COM number your modem is on (Usually COM3 or COM4). On Windows, you can find it in Device Manager.
- Create a shortcut to mm_manager like this:
- <path_to_mm_manager.exe> -m -n 18004104104 -f \\.\COM# -vv -l install.dlog -p install.pcap
- Replace 18004104104 with your manager number and the # after COM with the COM number your modem has.
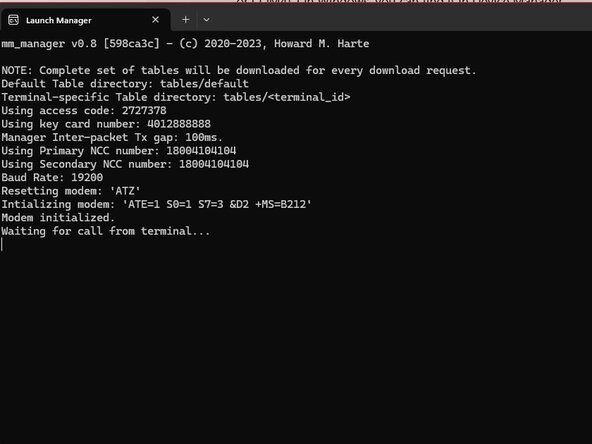
- Now start up mm_manager. If everything goes right, you should see "Waiting for call from terminal..." at the bottom of the console window.
- When you plug in your phone for the first time, you should see "* out of service *" printed on the bottom line.
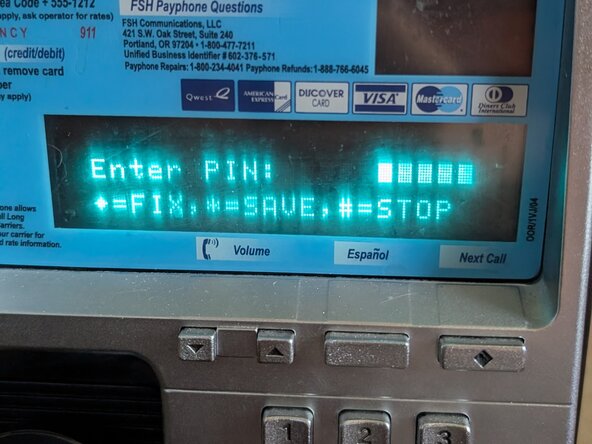
- On the phone's keypad, type 2727378 (CRASERV). When the phone prompts for a PIN, enter any above 50000 and press *.
- When the phone prompts, unlock the terminal with the T-Key near the top left of the housing. If you're using a desk terminal, specify a card number in mm_manager and insert that card when prompted.
- On the next screen, press # to install.
- First, the phone will ask you to preform a C.O. connection check. Take the receiver off hook and put it back on hook once "Completed: 00" is displayed.
- Next, the phone will ask for the line number. Enter the phone number for the terminal and press *.
- Next, the phone will ask for a serial number. 1234567890 will work fine.
- Next, the phone will ask for the NCC number. Enter the number you are using for mm_manager, which is the one you specified in mm_manager's launch options and in the ATA dial plan.
- The phone will then preform an answer detection check. If this fails, make sure you enabled Polarity Reversal on the ATA in Step 3.
- Once "Press * to start NCC download" appears, wait 15 seconds, and then press * to download the configuration. This can take around 5 minutes.
- Afterwards, complete the various tests the phone has you do. Once completed, lock the terminal to put it in service (standard millenniums) or press # to put it in service (desk millenniums).
- If you do not have an ID bezel, you may need to open the phone to insert the calibration coins.