GARMIN FORERUNNER 645 Case Replacement for Broken Strap Anchor
ID: 194199
Description:
Steps:
- GARMIN FORERUNNER 645 outer case replacement due to broken watch band lug. A friend asked me as a favor if I could replace the outer case of his watch because the lug for one of the straps had broken. He provided the replacement part himself, which he bought on AliExpress.
- To separate the display from the case, we need to create a gap with a utility knife to cut the display adhesive, being careful to insert it only about 2 mm, and use hot air to soften the adhesive. I recommend using one of the Pro Tech Go Toolkit toolkits.
- Depending on the power of the heat gun, BE CAREFUL not to place it too close, or you will burn your fingers.
- Other useful tools, such as a thin-blade knife, will also be helpful.
- We will use one of the tools from the Jimmy toolkit to help separate the two halves.
- In photo 3, we can see the adhesive residue on the edge.
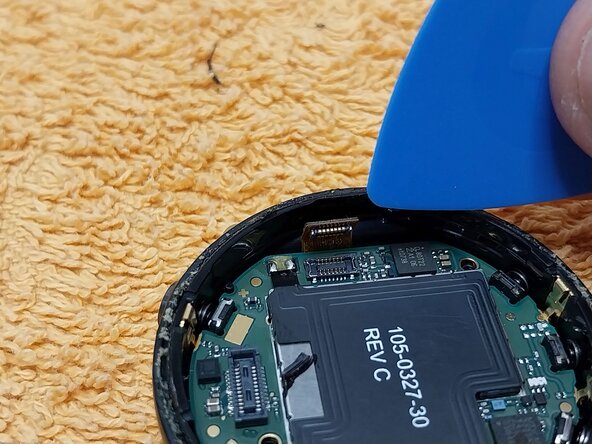
- The next step is to disconnect the flex cable that connects the display to the PCB; we will use iFixit Opening Tool to assist us.
- To remove the 2 screws from the PCB, we will use the T4 TORX bit Pro Tech Go Toolkit
- Unscrew the 2 Torx screws and remove them with precision tweezers.
- With the 2 screws loosened, unhook the flex cable that connects the housing to the PCB; use a iFixit Opening Picks (Set of 6) to gently pry it up.
- To separate the case from the PCB, use a non-metallic tool to gently pry it open. iFixit Opening Tool
- We see the PCB already removed from the case.
- Position the PCB in the new case and, by applying light pressure with your fingers in a pinching motion, snap it into place.
- Press the flex connector into place. Although it is small, it is very easy to position.
- We replace the screws, since the tip is not magnetized, by placing them with Precision Tweezers Set tweezers before screwing them in.
- View of the iFixit tools used and other useful tools such as a thin-blade knife.
- Once the case is assembled, the screen must be attached to the case; I used contact cement, applied with the help of a thin, flat driver bit. Apply a small amount to a plastic surface and apply it to the circle of the case.
- Once the contact adhesive has been applied around the entire perimeter, insert the flex cable into its socket and carefully close the two halves.
- Once the 2 parts are inserted, the excess contact adhesive can be removed with iFixit Opening Tool
- The next step is to firmly clamp the 2 parts together and apply electrical tape, letting it dry for about 12 hours.
- After 12 hours have passed, we can remove the tape and retrieve the QR code from the case we replaced in order to glue it onto the new one using a cyanoacrylate-type adhesive; in my case, since I had to return it the next day, I cut the electrical tape and did it immediately.
- To attach the QR code plate, apply a drop of quick-drying glue.
- Leave the watch taped for 12 hours so the contact cement bonds properly.
- END of guide.