Guide 4: CONGA ETERNAL MAX Robot - CECOTEC Model 05844 Only Spins in Circles After Wheel Repair.
ID: 195063
Description:
Steps:
- This cleaning robot arrived to me after its owner had it disassembled following a wheel repair, waiting to be reassembled, because it would only spin in circles to the left and right without moving from the spot.
- As it was, I performed several tests and checks on the vacuum motor and the infrared sensors, since the problem was not with the two drive wheels.
- After the teardown of all the bottom screws, I focus on the upper laser detector, "the turret that protrudes from the top, which didn't seem to be rotating at any point.
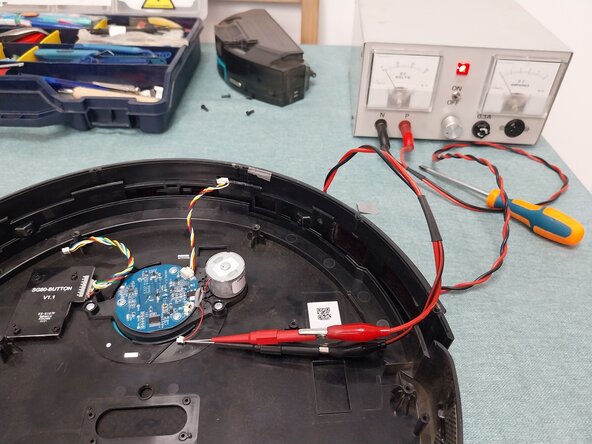
- The first check is to disconnect the motor connector to power it with an external power supply.
- Tested between 1.5 and 5 V, the motor spins without any problem, so the issue seems to be with the laser sensor; the problem is no longer the price, which is expensive anyway, but finding the right replacement part.
- I performed a test by setting up the manufacturer's APP on the phone, seeing to my surprise that the robot works perfectly with the joystick-type movement controlled from the phone screen and can be steered wherever we want, which confirms that the problem is the laser positioner on the top.
- I am reassembling the motor, and considering the repair a lost cause, since my friend was not planning to look for and buy the replacement part. Looking inside again, the robot arrived to me with the connector plugged into the front, I notice that the motor cavity is in the central part and there is a deformed connector bent next to that cavity, a connector "that is free".
- (That makes 2 coincidences) Could it be that the laser positioner connector is in the wrong place? I test it in the free socket and it fits perfectly, but one of the wires needs to be soldered because the pin of the female connector on the PCB broke while trying to straighten the bent pins.
- I replace the top cover, now with the connector assembled and the broken pin soldered directly to the PCB; I assemble the essential parts to be able to test the robot, and it reacts and begins to function correctly.
- Moral: Like a cable + connector swapped in position, failing to photograph the position of the connectors when disassembling can drive you crazy looking for faults where none exist, no matter how much I say and repeat it: Photograph every step of a device's teardown. This robot was out of commission for months because of "this fault".
- 2nd Moral: Do not trust what has already been disassembled by others before it reaches you.
- Other guides for this robot: Robot CONGA ETERNAL MAX - CECOTEC Modelo 05844
- END of the guide.