How to Clean a 2010-2016 Buick LaCrosse Mass Airflow Sensor
ID: 199350
Description: If your 2011 Buick LaCrosse is showing a check...
Steps:
- Use the release lever inside your vehicle (usually near the driver’s side kick panel) to pop the hood.
- Secure the hood with the prop rod.
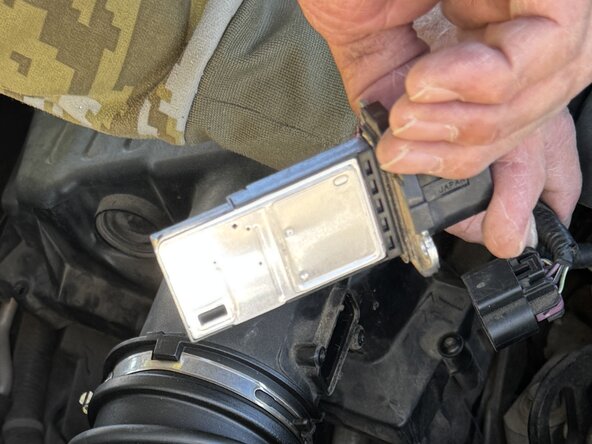
- The MAF sensor is typically located between the air filter box and the throttle body. It’s a small rectangular sensor attached to the air intake tube.
- Press down on the small plastic tab or pull back the red locking clip (depending on your model), then gently pull the connector straight out.
- Avoid pulling on the cable—grip the connector to prevent damage.
- Use a Torx T20 or T25 screwdriver to remove the two screws on either side of the connector socket.
- Turn them counterclockwise until they come loose, then remove them by hand.
- Place the screws in a small container or magnetic tray so you don’t lose them. They’re easy to drop into the engine bay.
- Gently pull the MAF sensor straight out of its housing. If there’s any resistance, wiggle it slightly while pulling upward to release it.
- Be careful not to touch the thin metal wires or the small sensors inside. They’re extremely delicate and can be damaged easily.
- Hold the sensor by its plastic base and spray it generously with Mass Air Flow Sensor Cleaner (available at any auto parts store).
- Spray the internal sensing elements and the small wire grids thoroughly with about 10–15 quick bursts.
- Place the sensor on a clean paper towel or cloth in a safe area. Allow it to air dry for at least 15–20 minutes.
- Do not use compressed air or a towel to speed it up. Any contact or high pressure could damage the sensor elements.
- Carefully place the sensor back into its slot with the silver portion (sensor probe) facing down into the airflow path.
- Reinsert and tighten the two screws until snug, but don’t overtighten.
- Reconnect the electrical plug until it clicks securely into place.
- Close the hood and start your car.
- Let the engine run for a few minutes.
- The check engine light should automatically turn off.
- If it remains on, double check your connections and ensure the sensor is completely dry and properly installed.