Logitech Zone Wireless 2 ES for Business Battery Replacement
ID: 199469
Description: Follow this guide to replace a worn-out or dead...
Steps:
- Power off the headset and unplug all cables.
- If you're replacing the battery, you only need to remove the ear pad from the side that doesn't have the boom mic.
- With one hand, firmly hold the ear cup steady.
- With your free hand, twist the ear pad counter-clockwise until it feels loose.
- Remove the ear pad.
- To install the ear pad:
- Align the ear pad's notches to the tabs on the ear cup.
- Press the pad onto the cup.
- Twist the pad clockwise until it locks in place.
- Use a Phillips screwdriver to remove the four 7.2 mm‑long screws securing the speaker housing.
- Be careful not to drop the screws in the speaker grille. You can cover the grille with some tape to prevent accidental drops.
- Don't try to fully remove the speaker housing, as a cable connects it to the ear cup.
- Use your fingers to lift and swing the speaker housing out of the ear cup.
- Lay the speaker housing by the ear cup, making sure not to strain the flex cable.
- During reassembly, make sure all cables are fully seated in their sockets and aren't pinched by the housing.
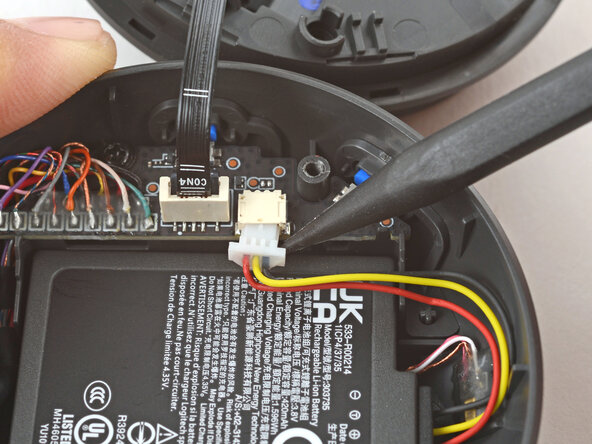
- Use the point of a spudger to push on alternating sides of the battery connector to "walk" it out of its socket.
- You can also use your fingernails to grip the connector edges and gently pull it out.
- Use your fingers to remove the battery from the ear cup.
- During reassembly, it may be easier to reconnect the battery before laying it in place.