Motorola Moto G Stylus 5G 2023 Display Replacement
ID: 199704
Description: Motorola Moto G Stylus 5G 2023, Model XT2315,...
Steps:
- Use a SIM eject tool to remove the SIM tray.
- Gently pull the SIM tray from the left side when the screen is facing upward.
- Push the tip of the stylus to release the lock.
- With the screen facing up, remove the stylus from the bottom-right corner of the phone.
- Place the screen facing downward.
- Use the small suction cup to create a gap for the opening pick to fit.
- Place the suction cup near a corner for easier access to insert the opening pick.
- Insert the opening pick into a corner of the phone and move around the backing to release the adhesive.
- Pull the backing off of the phone.
- Use tweezers to remove the yellow tape.
- Use the opening pick to remove the camera lens cover.
- Remove the ten 3.2 mm screws from the camera lens frame using a Phillips #0 screwdriver.
- Pry off the camera lens frame with the iFixit opening pick.
- Peel off the graphite film with tweezers.
- Remove the remaining silver 2.1mm screw from the top-left corner with a Phillips #0 screwdriver.
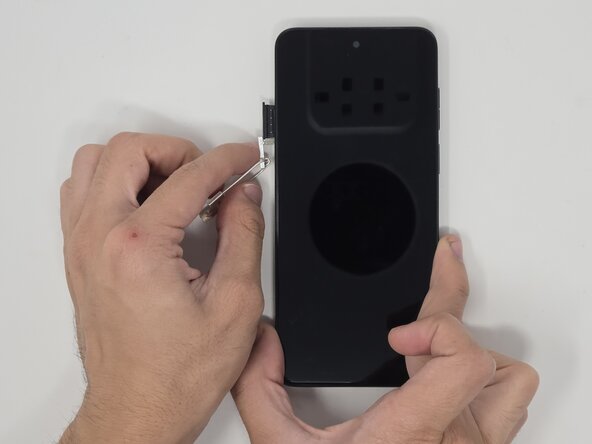
- Remove each of the four cables attached to the back panel with the opening pick.
- Remove the silver coaxial cables on the right side of the phone.
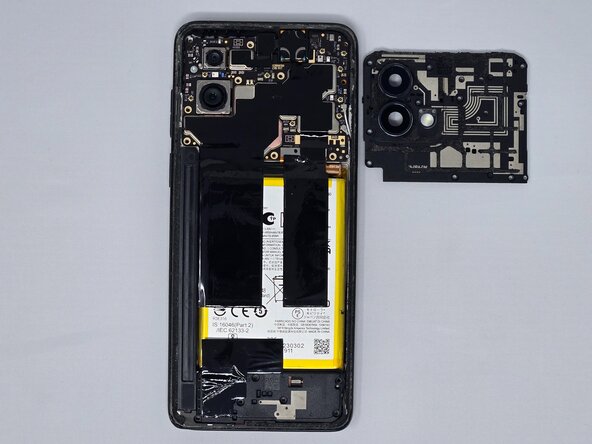
- Use iFixit tweezers or the opening pick to find an opening and remove the motherboard.
- Remove the six 3.2 mm screws from the speaker using a Phillips #0 screwdriver.
- Pry off the speaker module with the iFixit opening pick.
- Disconnect the cable attached to the back panel with tweezers.
- Disconnect the silver coaxial cables on the right side of the phone.
- Remove the silver 2.1 mm screw using a Phillips #0 screwdriver.
- Use iFixit tweezers or the opening pick to find an opening and remove the entire charging port.
- Pry the battery out using the iFixit Jimmy.
- Apply isopropyl alcohol or heat to loosen the adhesive underneath the battery component.
- Remove the flexible printed circuit board.
- Flip the phone to the opposite side after disconnecting the printed circuit board.
- Apply heat with any blowdryer in a concentrated area to pry the iFixit Jimmy under the screen.
- Move the Jimmy around the screen to continue to loosen, then remove the screen.