HP 15-f387wm Wi-Fi Card Replacement
ID: 199724
Description: The HP 15-f387wm is a lightweight and reliable...
Steps:
- Make sure the laptop is completely powered off and unplugged. Disconnect all chargers to prevent electrical shock and ensure a safe repair environment.
- Flip the laptop upside down to access the bottom panel.
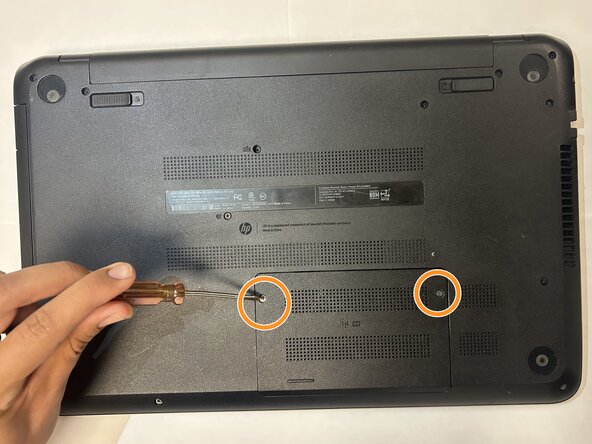
- Remove the two 3mm Phillips #1 screws.
- If the cover feels stuck, gently use a prying tool to take the cover off.
- Remove the two 3mm screws that hold the Wi-Fi card in place.
- If the Wi-Fi card is difficult to lift, gently use a plastic prying tool to pop it up.
- Lift the Wi-Fi card from the edges and carefully pull it upward.
- Disconnect the remaining cable from the Wi-Fi card.
- When installing the new Wi-Fi Card, start by reconnecting the cable.
- Carefully align the connector with the port. This is located in the top right area of the board. Press it in firmly with your fingers until you hear or feel a soft click.
- Make sure to handle the cable gently, as it can loosen or disconnect if not seated properly.
- Position the new Wi-Fi card in place. Align it with both screw holes and gently lower it into the chassis to keep it in place.
- Reinstall the bottom cover and tighten both screws. After everything is properly assembled, your replacement is complete.