LG V40 ThinQ Screen Replacement
ID: 200057
Description: If your LG V40 ThinQ’s screen is damaged or...
Steps:
- Use an iOpener or hairdryer to heat the adhesive on the back cover by rolling it up and down the back of the phone.
- You will know when the back is hot enough when an Opening pick is able to slide under the back cover.
- Use opening to pry the back cover away from the adhesive.
- This can take some time. Be patient and go slowly.
- We recommend you move slowly and carefully to not crack the back glass.
- Carefully disconnect the fingerprint sensor from the back camera lens cover.
- Use the opening picks again to gently remove the back camera lens cover and fingerprint sensor off from the back cover.
- Set the fingerprint sensor and camera cover aside. You will need the fingerprint sensor to put into any new back cover bought for the phone.
- Clean the back cover of any old adhesive by gently heating the area with the iOpener to soften the adhesive.
- Use a cloth or cotton swab soaked in isopropyl alcohol to gently rub and dissolve the glue.
- Apply new adhesive on the back cover in the places where the old adhesive was applied.
- Remove the fourteen 15 mm-long Phillips #000 screws holding down the wireless charging coil and loudspeaker module.
- Disconnect the battery press connector.
- With the opening picks, very gently insert and pry the battery slowly until it comes free from the adhesive and remove it.
- This can take some time to safely remove the battery without damaging it. Be careful not to rip the battery from the adhesive holding it down.
- Disconnect the screen flex cable and remove the SIM card tray.
- Using the iOpener, heat up the screen.
- You will know when the screen is hot enough when an Opening pick is able to slide under the screen.
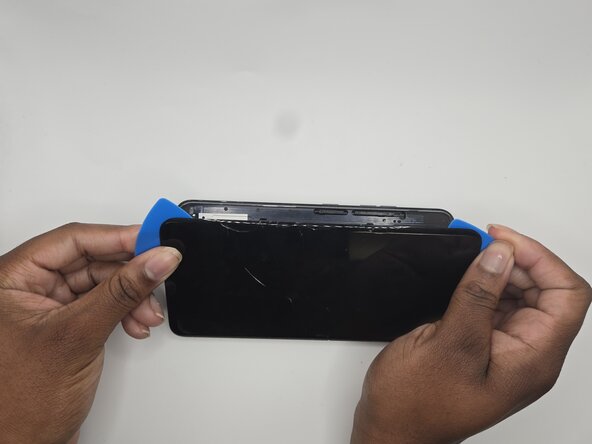
- Use Opening Picks to very gently pry the screen off.
- The screen can crack and shatter very easily. Move slowly and carefully to avoid injury.
- Clean the old adhesive holding down the screen.
- Apply new adhesive around the edges in the same spots as the old adhesive.
- Insert the screens flex cable through the front to the back.
- Connect the flex cable to the back of the phone.
- Firmly press the screen onto the fresh adhesive to glue it back down.
- The glue can take 5-10 minutes to start to cure but completely sets after 24hrs.