Toshiba Satellite E45t-B4204 Thermal Paste Replacement
ID: 200237
Description: Ever wondered why your laptop is running hotter...
Steps:
- Locate all of the screws on the back of the laptop as shown by the image. There are two screws that hold the battery in place.
- The screws holding the back of the laptop and battery in place are 4mm.
- With a Phillips #1 screwdriver, remove all 14 screws on the back side of the laptop.
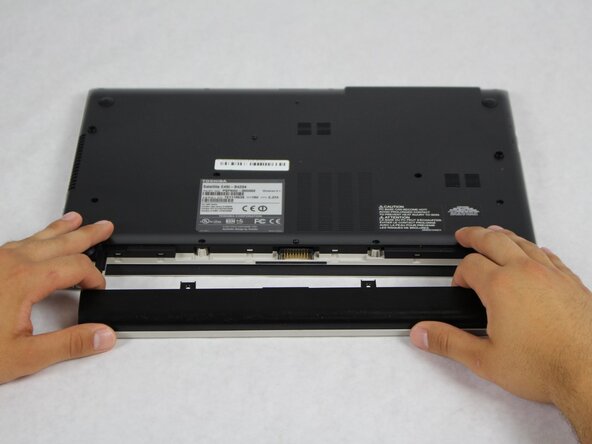
- After removing all of the screws, gently remove the battery.
- Lift up the backplate from the empty battery slot to create small gaps.
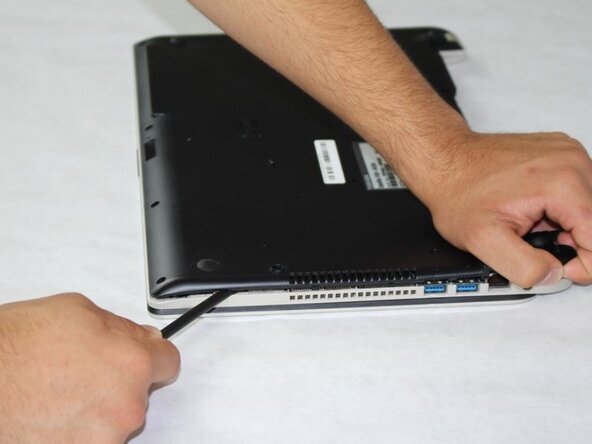
- Use the spudger or an opening pick to gently pry open the backplate.
- There are two 4mm screws holding the fan. Remove those screws with the Phillips #1 screwdriver.
- There is a connector with red, yellow, and black wiring. Gently remove the clip from the slot.
- There are four 3mm screws holding copper heat sink on the CPU. Use the Phillips #1 screwdriver to remove them.
- After removing the screws, carefully remove the heat sink from the motherboard and casing.
- Use a cotton swab with 99% Isopropyl alcohol applied to clean the old thermal paste off the CPU.
- Apply thermal paste to the two metal parts of the CPU.
- Be careful not to overdo the thermal paste application. You only need a little bit of thermal paste and applying too much can cause the thermal performance to struggle and potentially hardware damage.
- After applying the thermal paste, carefully put the heat sink back in place. Carefully placing the heat sink will ensure that the thermal paste stays in place.
- After putting the heat sink in place, apply the 4 screws with the Phillips #1 screwdriver.
- After reinstalling the copper heat sink, put the fan back in place. Apply the two 4mm screws with the Phillips #1 screwdriver.
- After screwing, reconnect the fan cable to the motherboard slot.
- Place the backplate onto the laptop and press on the edges to snap the backplate into place.
- Place the battery into the laptop's battery slot.
- Apply the fourteen 4mm screws using the Phillips #1 screwdriver to hold the backplate and battery in place.