2014-Present Kia Sedona Cargo Lamp Assembly Replacement
ID: 205028
Description: This guide shows how to remove and replace the...
Steps:
- The lens cover has six plastic tabs that hold it in place.
- The two rear tabs are larger and harder to unclip.
- These tabs are very stiff. Take your time and be careful not to scratch the plastic. You may need to use a bit of force to unclip these.
- Insert a metal spudger or a small flathead screwdriver into the front seam near the toggle switch.
- Pry to release the front tabs.
- Use a spudger or Jimmy to pry and release the side tabs.
- Tilt and wiggle the lens cover until the rear tabs release.
- Remove the lens cover and the gray cover plate behind it.
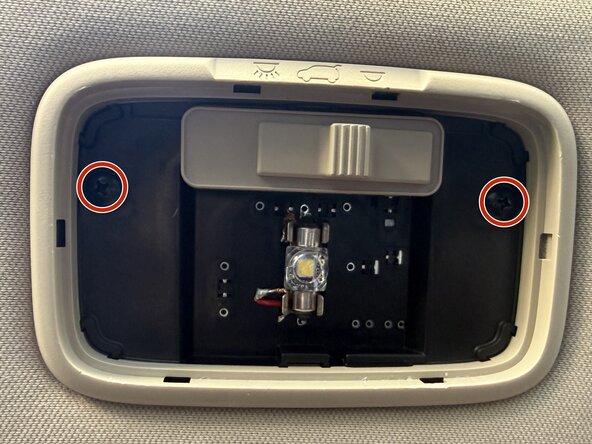
- Use a Phillips screwdriver to remove the two screws securing the lamp assembly.
- Grab the front edge of the assembly and pull downwards to unclip the edge.
- Pull the entire assembly towards you to release the rear tabs.
- Squeeze and disconnect the wire harness from the lamp assembly.
- Remove the lamp assembly.
- Use tweezers to carefully recover the two plastic clips from the ceiling cutouts.
- The remaining steps show how to install the cargo lamp assembly.
- Place the two loose clips in place on the underside of the lamp assembly.
- Use a Phillips screwdriver to install the two screws to secure the clips onto the lamp assembly.
- Slide the lamp assembly's rear tabs into their cutouts in the ceiling.
- Press the lamp assembly into the ceiling until all clips click into place.
- Align and stack the lens cover and gray cover plate together
- Insert the two larger rear tabs into their recesses.
- Press the covers into place until all tabs click into place.