Surface Pro 7+ Screen Removal
ID: 212439
Description:
Steps:
- Before starting this repair, allow your Surface Pro's battery to drain below 25%. A charged battery may catch fire if damaged.
- Unplug all cables and fully shut down your tablet.
- If you have a keyboard attached, remove it.
- Open the kickstand to about 90 degrees.
- Firmly press a SIM eject tool into the small hole in the corner of the SSD door until it pops up.
- Alternatively, you can also use a small, straightened paper clip.
- Remove the SSD door.
- Removing the SSD also functions as a battery disconnect and should be done before all major repairs.
- Use a Torx Plus 3IP screwdriver to remove the 2.2 mm‑long screw securing the SSD.
- Don't pull up at a sharp angle, or you may damage the SSD and its socket.
- Use your fingers to pull the SSD out of its socket at a shallow angle.
- Leave the SSD removed to keep the battery disconnected.
- Slide the SSD door back into its recess and press down on the bottom edge until it clicks into place.
- Close the kickstand and flip your device over so the screen is facing up.
- Heating the screen helps soften the adhesive securing it, making it easier to open.
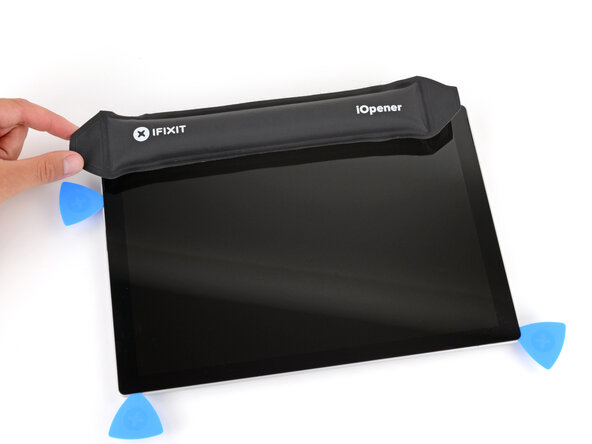
- Heat an iOpener and lay it on the right edge of the screen for two minutes to soften the adhesive.
- Alternatively, you can use a hair dryer or heat gun to soften the adhesive. For a more detailed look at best practices for using a hair dryer, check out this guide. For information on heat gun use, check out this guide.
- Don't insert your pick more than 8 mm when separating the screen adhesive. Otherwise, you may damage your device's internals.
- When separating the top edge adhesive, follow instructions carefully to avoid damaging the front camera.
- To prevent inserting your pick too far, measure 8 mm from the tip and mark the opening pick with a permanent marker.
- Alternatively, tape a coin to a pick 8 mm from the tip.
- If you're having trouble separating the adhesive, use the third photo as a reference for the adhesive location.
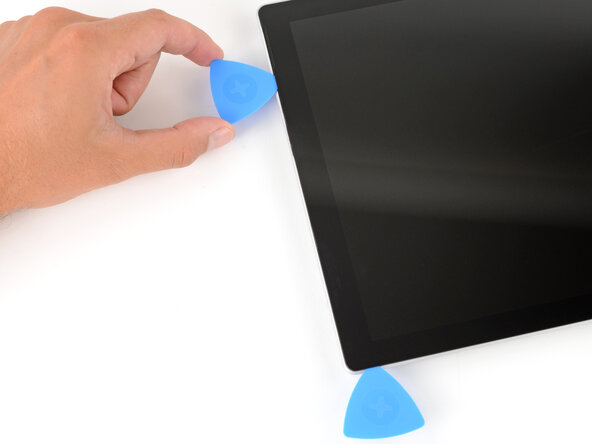
- Insert the tip of an opening pick under the screen near the bottom of the right speaker cutout.
- Be careful not to damage the speaker mesh, or you'll need to replace it.
- Slide your pick towards the bottom edge so the tip goes under the notch in the screen.
- Remember not to insert your pick more than 8 mm.
- Slide the pick down the right edge to separate the adhesive securing it.
- Leave the pick inserted under the bottom right corner to prevent the adhesive from re‑sealing.
- Heat the bottom edge of the screen with an iOpener, hair dryer, or heat gun.
- Remember not to insert your pick more than 8 mm.
- Insert a second pick under the bottom right corner of the screen and slide it along the bottom edge to separate the adhesive.
- Leave the second pick inserted under the bottom left corner to prevent the adhesive from re‑sealing.
- Heat the left edge of the screen with an iOpener, hair dryer, or heat gun.
- Remember not to insert your pick more than 8 mm.
- Insert a third pick under the bottom left corner of the screen and slide it up the left edge, stopping when you get to the bottom of the left speaker cutout.
- Leave the pick inserted under the screen to prevent the adhesive from re-sealing.
- Heat the top edge of the screen with an iOpener, hair dryer, or heat gun.
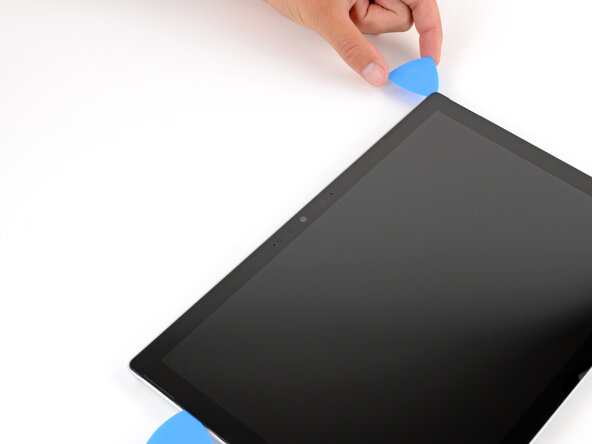
- Insert a fourth pick under the screen near the top of the left speaker cutout.
- Slide your pick towards the top edge so the tip goes under the notch in the screen.
- Don't slide the pick over the front facing camera. Remove the pick enough that it can slide past the camera without touching it.
- Slide the pick along the top edge to separate the adhesive.
- You'll likely need to slide the pick around the perimeter a second time to fully separate all the screen adhesive.
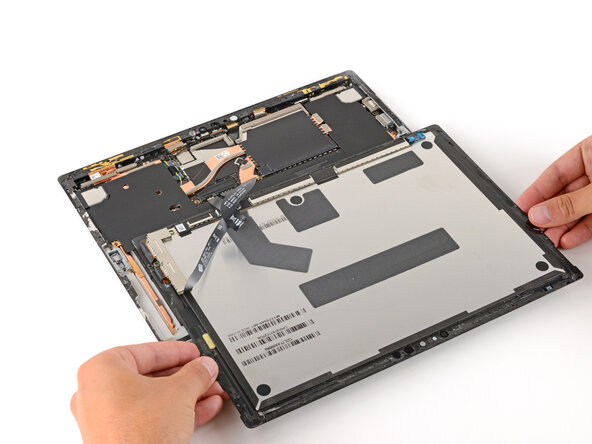
- Once the screen is fully separated, slightly lift the top edge and flip the screen so it can lay flat.
- Be careful not to strain the screen cables.
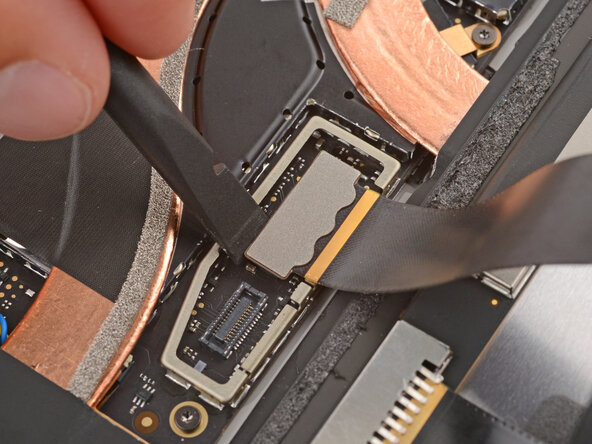
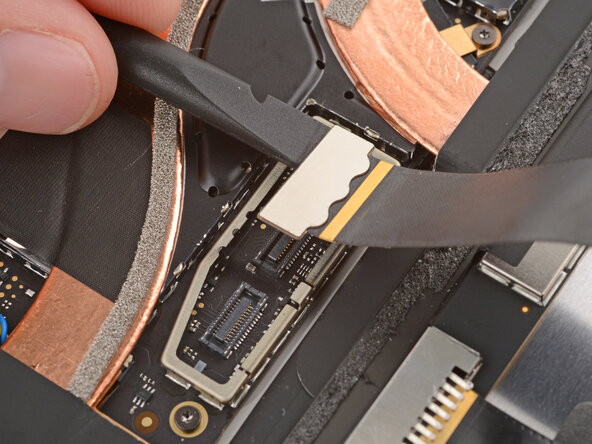
- Use the flat end of a spudger to gently lift the edges of the metal screen cable cover to unclip it.
- Be careful not to deform the cover too much, as you'll need to reinstall it during reassembly.
- Remove the cable cover.
- Use a spudger to pry up and disconnect the smaller screen cable press connector.
- Use a spudger to pry up and disconnect the wide screen cable press connector, starting on one of the short sides and moving to the other.
- Remove the screen.