HP Chromebook 14a-na0031wm Screen Replacement
ID: 212653
Description: This guide will instruct you on how to remove...
Steps:
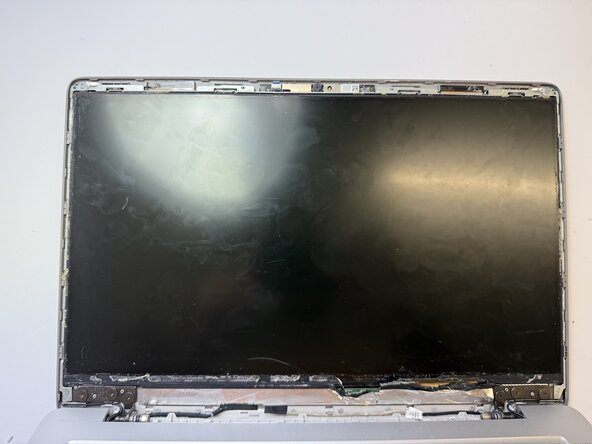
- Insert a Jimmy between the plastic front frame (the bezel) and the display assembly.
- Carefully run the tool around the edges to cut through and separate the double-sided tape holding the bezel in place.
- Run the Jimmy across the bottom back side (near the hinge/base) to separate the bottom edge.
- Once the adhesive is completely separated, pull the entire plastic bezel off.
- The LCD screen is not held in by screws; it is secured with stretch-release double-sided tape.
- Locate the two small white adhesive pull-tabs sticking out from the bottom left and bottom right corners behind the screen.
- Gently and steadily pull these tape strips straight out from behind the LCD.
- Pull both the left and right strips completely out to release the screen.
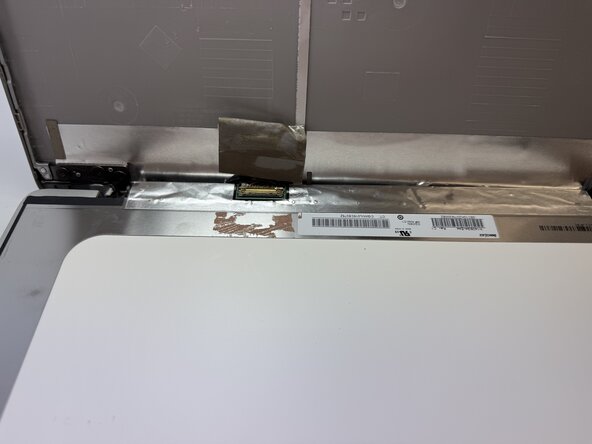
- Once the tape is removed, the screen will come loose. Carefully tilt it forward and lay it face-down onto the keyboard.
- Locate the display cable connector on the back of the screen.
- Peel back the protective clear tape covering the connection.
- Flip up the small locking clip securing the cable.
- Slide the cable straight back (away from the screen) to disconnect it.