Use a multimeter to test the phone battery
ID: 213003
Description: If your smartphone won’t turn on, drains...
Steps:
- Tools Required Digital multimeter Test leads (probes) Screwdriver (depending on phone model) Plastic pry tool (optional)
- Set your multimeter to DC voltage (V⎓) Use a range higher than 5V (or auto-range mode) Ensure your probes are properly connected Step 2 — Open the Phone Back Cover
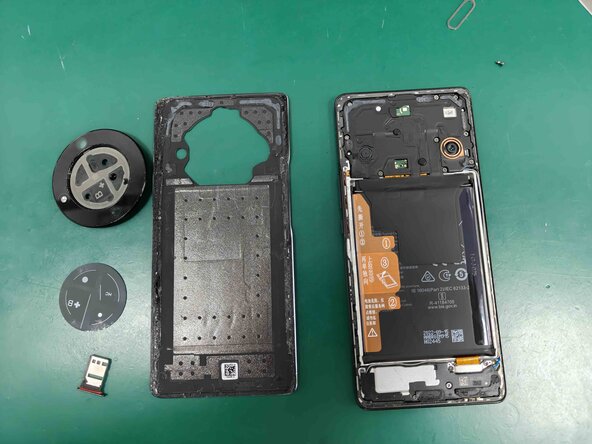
- Carefully remove the back cover of the smartphone using the appropriate tools.
- Tips: Some phones require screws to be removed first Use a plastic pry tool to avoid damaging the housing Be gentle to avoid damaging internal components.
- Do NOT short the battery terminals Avoid using metal tools directly on connectors Disconnecting the battery ensures accurate measurement
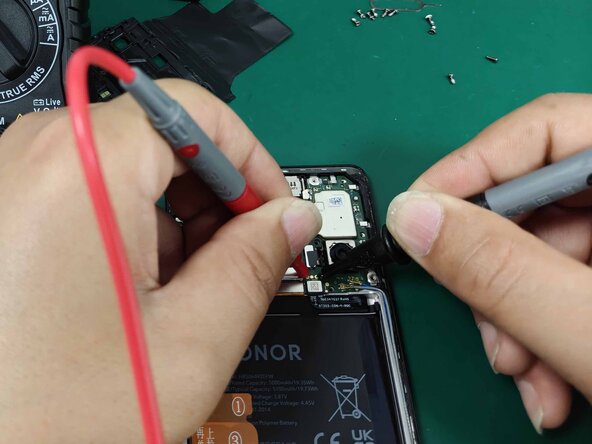
- Connect the red probe to the positive terminal of the battery and the black probe to the negative terminal. If the measured voltage is 4.32V, this indicates that the battery is fully charged and functioning properly.
- < 3.0V, Faulty / Over-discharged, battery may be damaged or deeply discharged.
- 3.0V – 3.5V, low Battery, needs charging, still functional.
- 3.6V – 3.9V, normal, typical operating voltage.
- 4.0V – 4.2V, good / High Charge, battery is in good condition.
- 4.2V, fully charged, standard full charge voltage
- 4.3V – 4.4V, High-voltage full, used in some modern lithium batteries.
- Reconnect the battery to the motherboard and repeat the voltage measurement. The voltage remained at 4.32V, indicating a stable battery health. There was no significant voltage drop, and the power supply was normal.
- If your battery voltage is within the normal range and stable (around 3.7V–4.35V), the battery is likely not the issue. You may need to check:
- Charging circuit
- Power IC
- Motherboard faults