Lenovo ThinkPad X13 Yoga Gen 1 Battery Replacement
ID: 213342
Description: This guide will show you how to replace the...
Steps:
- Close the device and flip the laptop over so the bottom cover is facing up.
- Using a Phillips #0 screwdriver, remove eight 5.5 mm screws from the bottom case.
- Remember to keep all screws accounted for!
- Insert a spudger or an opening tool in the seam between the bottom cover and top cover and slide it around the edge of the laptop to release the clips holding them together.
- If the bottom cover won't stay separated, leave opening picks in the seam as you work around the device to prevent the clips from reengaging.
- Gently remove the bottom cover.
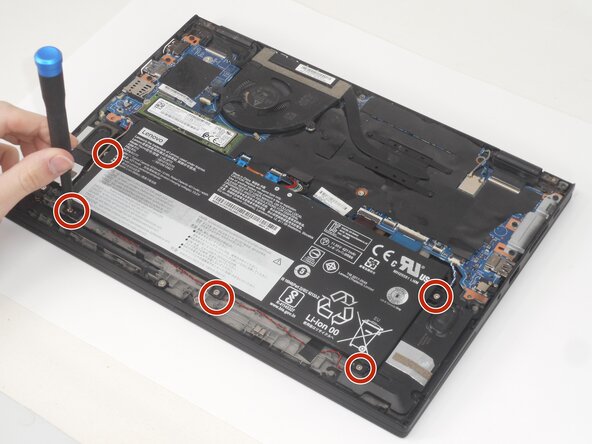
- Use a Phillips #0 screwdriver to remove the five 4.0 mm screws securing the battery.
- Remember to keep all screws accounted for!
- Use the flat end of a spudger to lift and unclip the outer edges of the flat top battery connector. You may need to use your fingers to pull the connector completely out of its socket.
- You may need to use your fingers to pull the connector completely out of its socket.
- Gently remove the battery from the laptop.