GameSir X5 Lite Action Button Replacement
ID: 213633
Description: If your controller's buttons are sticky or...
Steps:
- Use a Phillips #00 to remove the four 8 m screws on the back of the GameSir X5 Lite grips.
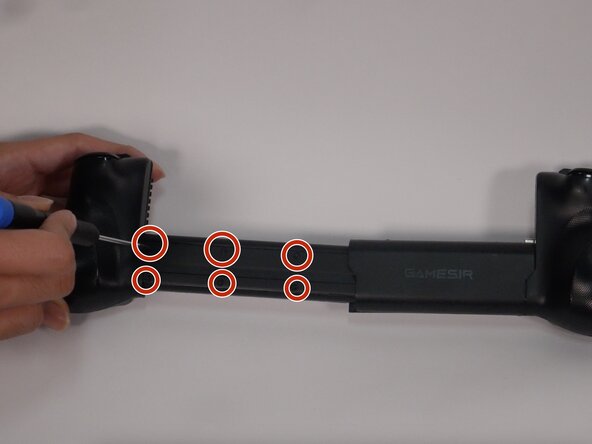
- Extend the controller and remove the six 5 mm screws off the back of the extender using Phillips #00 screwdriver.
- Insert an opening pick into the seam between the grips and the chassis pick to loosen the back cover to reach the end of the extender.
- Pull the extender to reach the last two 5 ml screws using a Phillips #00 screwdriver.
- Remove the last two 5 mm screws.
- Remove the springs to separate the two sides of the controller by unscrewing the two 5 mm Phillips #00 screws.
- Loosen the three 7 mm captive screws where the triggers are located using a Phillips 000 screwdriver, and remove one 7 ml screw that sits below the joystick.
- The three 7 ml screws where the triggers are located will not be separated, only loosened.
- Gently tilt the device over until the desired 1.14-inch buttons fall over, and replace them with your own.
- Once a new button has been inserted, simply twist it until its symbol is properly aligned on the front, as indicated by the button no longer moving.