Durofix RV332 Motor Replacement
ID: 23057
Description: If your Durofix RV332 cordless driver has...
Steps:
- Use the Phillips #0 screwdriver to remove six 13 mm screws from the casing.
- Place the screws in a small container so they don’t get lost.
- Use a plastic separating tool (or a prying tool) to gently pry apart the top and bottom halves of the driver’s plastic housing.
- Work slowly around the edges to avoid cracking the plastic or damaging internal clips.
- Once the casing is open, lift out the printed circuit board (PCB), battery, LED, and existing motor assembly as one unit from inside the housing.
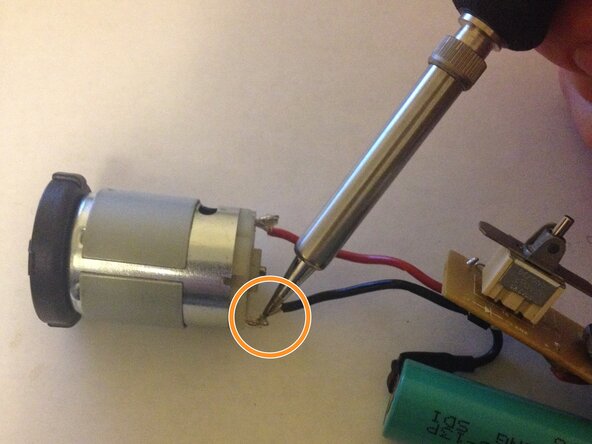
- Using wire cutters, cut the black and red motor wires where they connect to the motor. (You’ll later re-solder to the new motor.)
- Strip about ¼ inch (≈ 6 mm) of insulation off the ends of both red and black wires.
- Make sure the exposed wire is clean (unoxidized) and ready to solder.
- Before soldering, check that the contacts on the new motor are clean and free from residue.
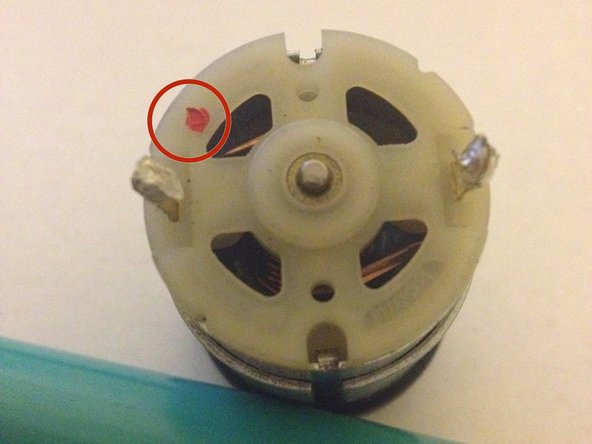
- Solder the red wire to the motor’s positive terminal (usually marked with a “+” or a red circle).
- Solder the black wire to the motor’s negative terminal (or the remaining terminal).
- Allow the solder joints and motor to cool down fully before proceeding.
- Solder carefully! Using a hot soldering tool may result in injury!
- Place the motor, along with the PCB, LED, and battery, back into the plastic housing in the correct orientation.
- Close the casing halves together, ensuring clips and alignment are correct.
- Reinsert and tighten the six screws you removed earlier.
- Finally, test the device to confirm the motor now works.
- If everything functions, you're done. If not, reopen and re-check your soldering and connections.