Dell Inspiron n5110 - HDD Replacement / Upgrade
ID: 28194
Description: This laptop has a strange engineering design....
Steps:
- Switch off the laptop and remove the battery.
- The keyboard is held by 4x locking clips.
- By using cutter, carefully lift up the one side of the keyboard and start opening the locking clips.
- Remove the RAM memory cover and the DVD drive.
- Now you have 12x M 2.5x5.0 screws.
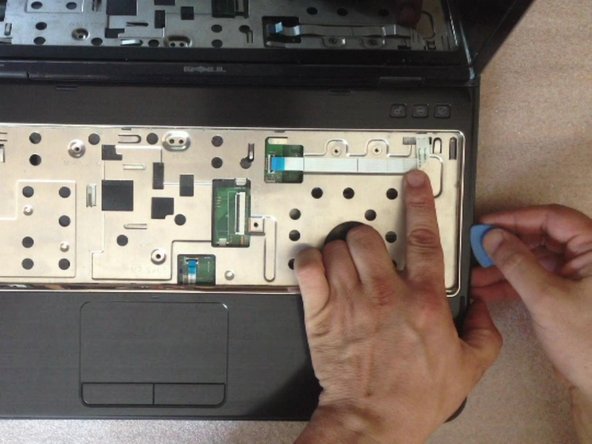
- Unscrew 4x M 2.5x5.0 screws and disconnect the 3x flex cables:
- Power on flex cable
- Mouse pad flex cable
- Hot keys flex cable
- By using a plastic tool remove the upper case.
- Disconnect:
- The LCD display flex cable
- The WiFi & Blue-tooth coaxial cables
- The speaker connector.
- Remove 4x M 2.5.0.5 screws from the Display module hinges.
- Now you can remove the LCD display module.
- 5x M 2,5x5.0 screws hold the motherboard to the down bezel.
- Be careful with these two connectors:
- between motherboard and the additional charging port board,
- between motherboard and the additional WiFi card slot, USB connectors board.
- Start removing the motherboard from right side, near to the DVD drive connector.
- Finally you can find the hard disk drive on the back side of the motherboard.
- Remove the last two screws securing the hard drive.
- There are two strips of foam to prevent shock under the hard drive, which may stick to the drive due to heat—so, pull slowly away from the SATA connector so you don't damage any components.
- When you are installing the new HDD, hold the SATA connector with one finger.
- Now assemble the system. I hope everything was successful.
- .
- Please SUBSCRIBE to my channel ツ