Garmin Nuvi 2689LMT Microphone Replacement
ID: 72558
Description: A faulty microphone can cause the device to not...
Steps:
- Start by taking off the stand by depressing the table turning the round piece back toward you, pulling it away for the Garmin device.
- Use a T5 bit on a screwdriver to remove the 4 screws at the 4 corners on the back of the device.
- Right to tighten, left to loosen.
- Place the device face down on a flat surface, with the bottom facing you.
- Pry open the seam with a prying tool .
- There are two seams, the top one is artificial.
- Firmly force a plastic spudger into the bottom seam and pry open a section of the device
- Use a prying/pushing motion to force the tool into the device until there is a click
- Repeat all the way around the seam until the back comes off.
- When the seam is completely separated, lift the back away from the screen.
- Do not attempt to separate the unit until all the tabs have been separated.
- Wedge an angled plastic prying tool under the connector to the battery where the wires attach to the mother board
- Gently pry up the connector. It should come free easily.
- The battery is connected to the main circuit board by two wires, that are red and green and is attached to a white connector.
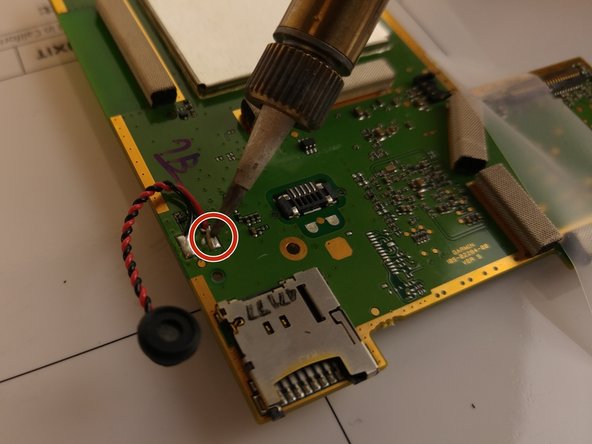
- Melt the two metal connections on the circuit board using a soldering iron.
- Remove the wires using tweezers.
- There are two wires that are connected to the main circuit board.
- Soldering irons will reach extremely high temperatures and should be used with caution.
- Retrieve your new microphone for your Garmin device and attach to the circuit board with the soldering iron.
- Carefully melt the solder onto the wire at the connection points on circuit board.
- Keep the solder on the metal contact point and avoid heating the plastic circuit board to prevent damage.