Razer Naga Epic Chroma Tracking Sensor Replacement
ID: 78817
Description:
Steps:
- Using a spudger, remove the teflon tape on the bottom of the mouse to reveal four screws.
- Use a Phillips #00 screwdriver to remove the four screws.
- Gently pull on the top plastic plate of the device and carefully unplug the white cord from the circuit board.
- When removing the chassis, carefully unplug the cord connecting to the top mouse buttons.
- Gently pull up on the right plate on the mouse; separating it.
- Carefully repeat this step for the left side.
- Be wary of the cable connecting to the twelve mouse buttons located on the left plate. This can be disconnected if needed.
- Take your nylon spudger to gently pry the battery pack from the device.
- Remove the foam on the battery shell for your new battery.
- Unplug the power cord from the circuit board in the mouse.
- Plug the cord of the new battery into the socket found in the bottom right of the circuit board.
- Insert the new battery into the battery socket.
- Place the foam on the surface of the new battery (reference Step 5).
- Remove the two screws holding the battery mount in place and remove the mount from the mouse.
- Disconnect the white connection strip from the white connection port on the circuit board.
- Disconnect the USB cable (the cable is located on the right and center of the circuit board).
- Remove the two screws that were on either side of the battery mount. This will allow the circuit board to be removed.
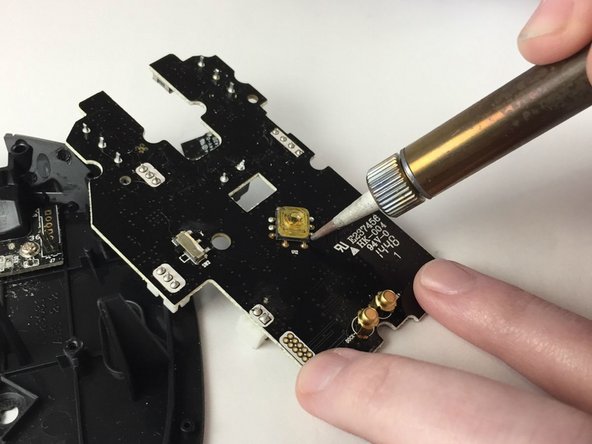
- Remove the circuit board and turn it over to its underside.
- Around the yellow sensor, located in the middle of the back of the circuit board, locate the eleven "leads" (soldered connections) surrounding the yellow sensor.
- Re-solder all eleven leads to the connection points of the sensor.
- This should fix the problem with the mouse sensor tracking issues.
- For soldering tips, refer to this guide.