Sony Vaio PCG-161L Speakers Replacement
ID: 87627
Description: Are your speakers in your Sony Vaio PCG-161L no...
Steps:
- Turn your device upside down and remove the 6 10mm screws attaching the back casing to the device using a phillips head screwdriver.
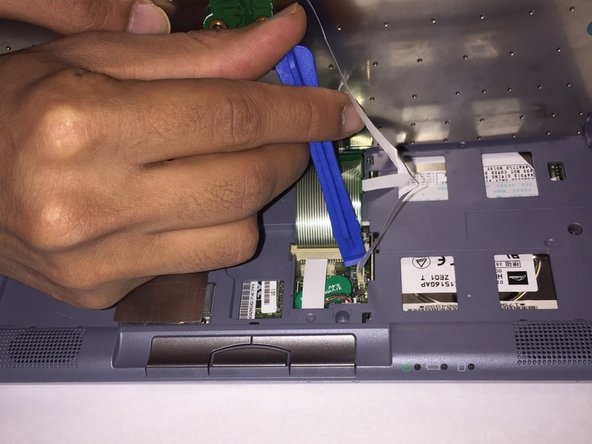
- Lift up underneath the keyboard using the iFixit opening tool to expose the ribbon wires connecting the keyboard to the motherboard.
- The two ribbon cables connecting the keyboard to the motherboard are held in using zero insertion force (ZIF) connectors.
- Use a plastic opening tool or your fingernail to flip up the small retaining flaps, then pull the ribbon cables out of their connectors.
- Remove the three 10 mm screws holding the casing to the top of the motherboard using a Phillips screwdriver.
- Remove the 6 mm Phillips #0 screw on the left side of the battery that holds the casing to the device.
- Turn the device upside down and remove the 6 mm Phillips #0 screw holding the casing to the device.
- Remove the top casing by lifting up on the plastic exposing the two speakers.
- Remove the two 4 mm screws attaching the broken speaker to the casing.
- Each speaker has two 4mm screws holding it to the casing. If you are removing both speakers, remove all four screws.
- Disconnect the wire from the board by pulling the wire out of the harness.
- These harnesses do not have any clips or tabs. Simply pull on the wire and it will come out of the harness.