Huawei P8 Lite Battery Replacement
ID: 95845
Description: If your Huawei P8 Lite won't hold a charge you...
Steps:
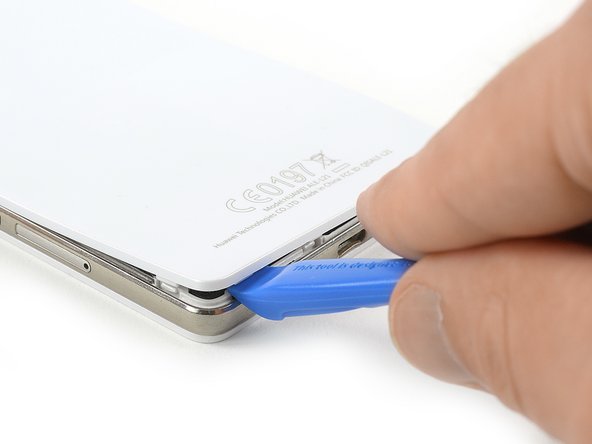
- Use an Opening Tool and start to lever up the back cover of your Huawei P8 Lite at the bottom of your phone.
- There are clips around the whole mid frame, holding down the back cover. Open all of them with the Opening Tool.
- When all clips are open, remove the back cover from the rest of the phone.
- If the back cover doesn't come freely, there are probably some additional clips that need to be disconnected.
- Use a tweezer to remove the warranty sticker which sits on a screw in the bottom right of your phone.
- Remove the 4 black Torx T5 screws which hold down the lower part of the loudspeaker.
- Remove the three silver Phillips #00 screws which hold down the upper part of the loudspeaker.
- Remove the loudspeaker carefully.
- Remove the three Phillips #00 screws that hold the metal plate in place.
- Remove the metal plate with a tweezer.
- Unplug the battery flex connector with a spudger.
- To protect your motherboard during battery removal, you can reinstall the shield plate, allowing for safer prying.
- Screw the three Phillips #00 screws back into the motherboard shield.
- Use a tweezer to loosen the adhesive strip and lift it up to give you an easy grip.
- Gently pull out the adhesive strip. Don't pull it in a steep but in a flat angle and with caution. It can tear in two pieces easily.
- If your phone is equipped with an NFC antenna continue with the next step to get it off. Skip the next step if it does not have an NFC antenna.
- Remove the Phillips #00 screw.
- Use a tweezer to remove the plastic cover.
- Carefully peel up the NFC tag and remove it.
- When reassembling make sure to install the NFC antenna onto the new battery and connect it.
- There are three adhesive strips beneath the battery you'll need to undo. One under the top, the mid and the bottom of the battery.
- Be very careful not to pry against the motherboard, you may damage surface mount components and lose functionality.
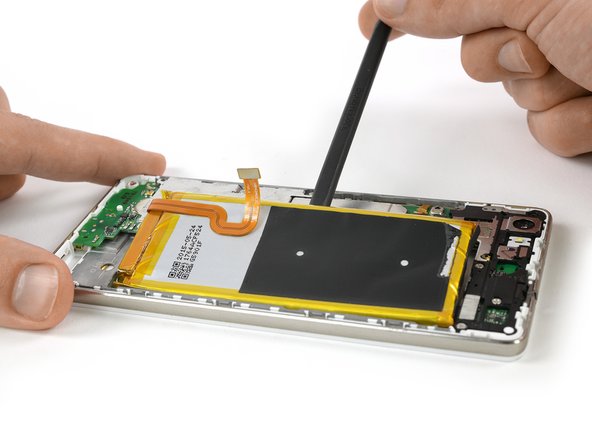
- Use a Spudger to carefully start to pry out your battery.
- Undo the adhesive beneath the battery with the Spudger.
- The easiest way to do so is by moving the Spudger in small movements like a lever.
- Remove the battery.
- If you reinstalled the metal motherboard shield to protect the motherboard while prying, you will have to remove it to connect your new battery.
- When reassembling your phone replace old adhesive with double-sided tape or pre-cut adhesive strips.