Acer Aspire TimelineX 1830T-68U118 RAM Replacement
ID: 98976
Description: In this guide, you will be able to replace your...
Steps:
- Remove the device's battery before beginning.
- Turn laptop so under side is facing up.
- Locate the hard drive door and unscrew the 5 screws using PH0 mm Phillips Head.
- Pry open hard drive cover using the Spudger tool.
- Remove screw attached to the hard drive using the PH0 mm Phillips Head.
- The hard drive can now be removed from the device.
- Remove battery before beginning.
- Use a Phillips #0 screwdriver to remove the 5 screws from the bottom cover.
- Pry open the cover using the Spudger tool.
- Remove the keyboard with a plastic opening tool or spudger.
- There is a plastic film that needs to be gently peeled from the laptop base.
- Use caution when removing the keyboard as it is fragile.
- Use a Phillips #0 screwdriver to remove the 4 screws from the motherboard shield.
- Remove the motherboard from the base of the laptop by unscrew the screw drivers using PH0 mm Phillips Head.
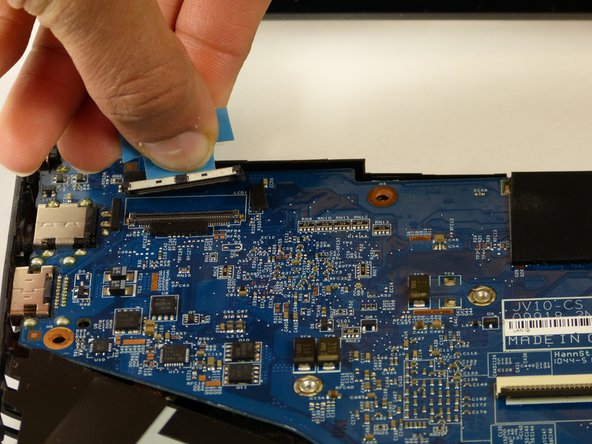
- Carefully remove the charger attachment in the top left.
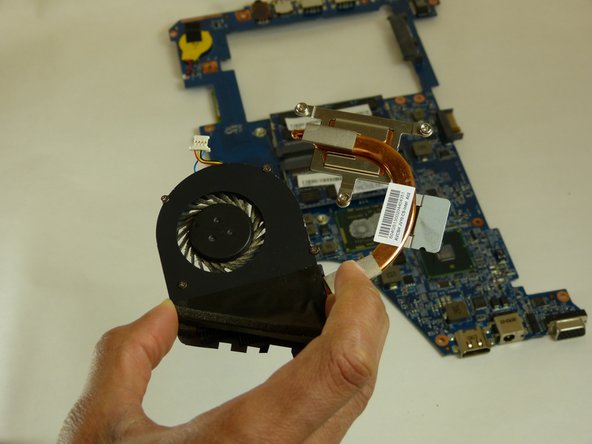
- Carefully remove the fan from the motherboard by detaching the plastic insert as seen in the pictures
- After removing the motherboard, turn it over so that the back side is facing you.
- To release the RAM from the motherboard, press both of the metal prongs on the sides of the RAM.
- After RAM memory card is released from the motherboard, hold the RAM card on a 45 degree angle and remove the card.
- Install your new RAM memory card following these steps in reverse.