HP Pavilion x360 m1-u001dx System Board (Motherboard) Replacement
ID: 99130
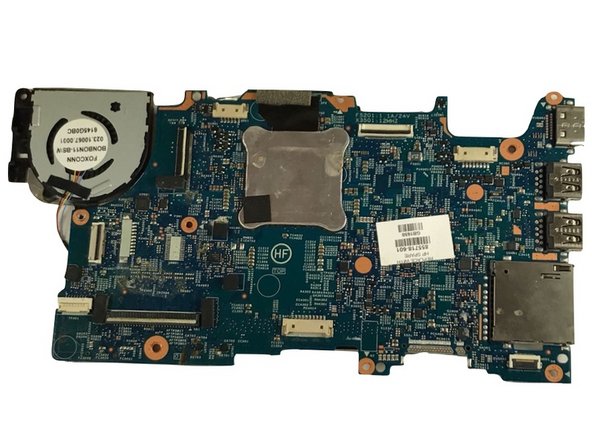
Description: If your laptop does not turn on or USB ports...
Steps:
- Power off your device and disconnect all external devices connected to the laptop.
- Working on your device while it is powered on may cause damage to the laptop or result in electric shock.
- Flip the laptop over and remove the rubber foot with a Metal Spudger.
- Remove the screws from the bottom of the laptop with a Phillips 00 Screwdriver.
- 5 Phillips 2.4 x 5.7 mm screws
- 7 Phillips 2.0 x 5.0 mm screws
- Keep the different sized screws separate for future replacement.
- Flip the laptop back over and open it; the keyboard should be facing upwards.
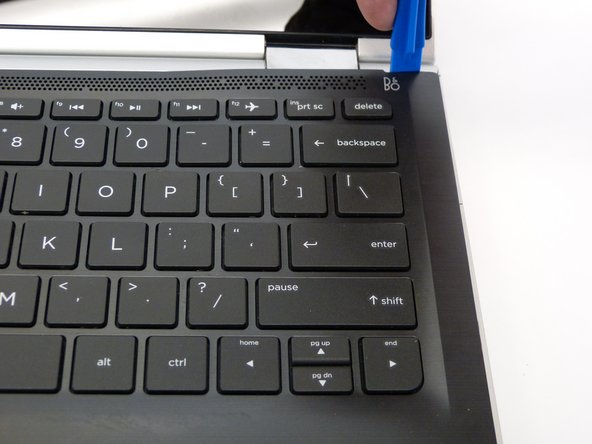
- Using the Plastic Opening Tool, separate the keyboard from the base of the laptop.
- The keyboard is connected to the motherboard with cable ribbons, so be very gentle and careful when lifting the keyboard.
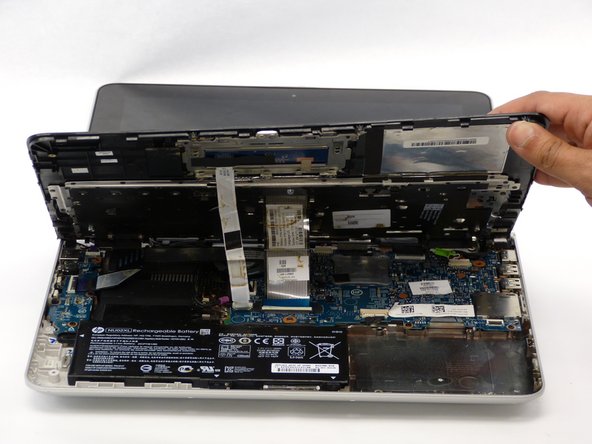
- Raising the keyboard, disconnect the first of two cable ribbons with the Heavy-Duty Spudger.
- Gently flip up the white plastic lock connecting the ribbon cable to the motherboard.
- Use the blue plastic tab on the ribbon cable to disconnect the ribbon cable from the lock.
- Gently flip up the white plastic lock connecting the second ribbon cable to the motherboard with the Heavy-Duty Spudger.
- Use the blue purple tab on the ribbon cable to disconnect the ribbon cable from the lock.
- After the ribbon cables are disconnected, gently lift up the keyboard to disconnect it from the base of the laptop.
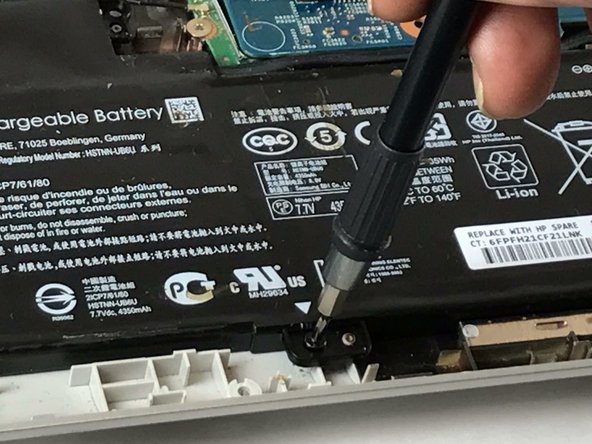
- Remove the screws from the perimeter of the battery with a Phillips 00 Screwdriver.
- 3 Phillips 2.0 x 4.6 mm screws
- Keep the different sized screws separate for future replacement.
- Holding the lower right corner, gently lift up the battery to disconnect it from the motherboard.
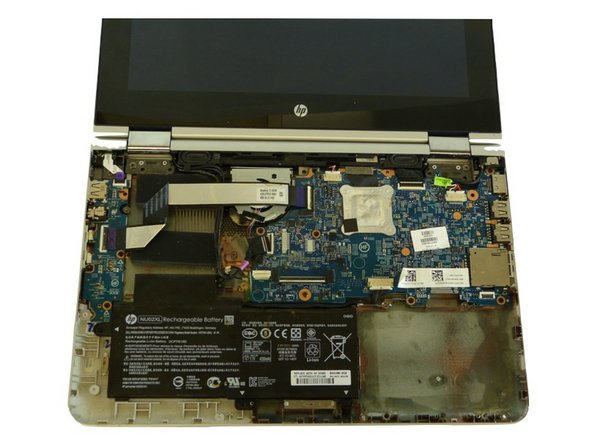
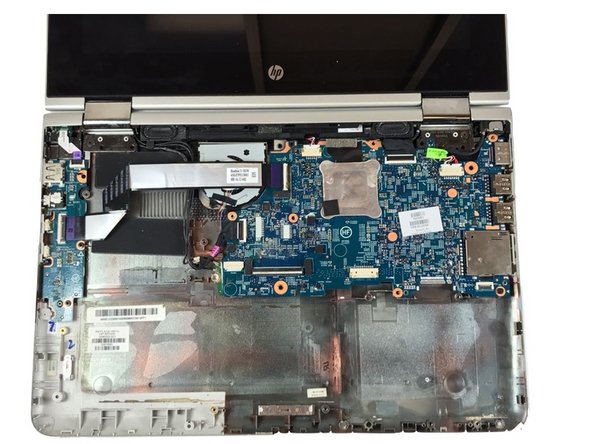
- Remove the screws from the perimeter of the motherboard with a Phillips 00 Screwdriver.
- 8 Phillips 2.0 x 4.7 mm screws.
- Keep the different sized screws separate for future replacement.
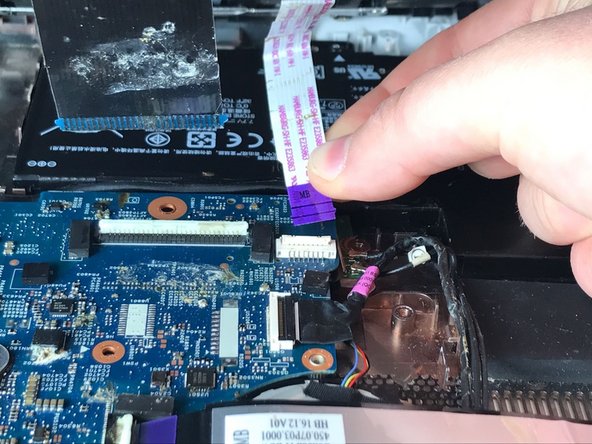
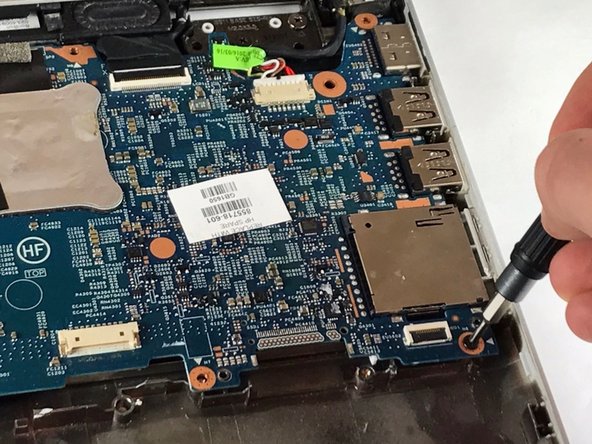
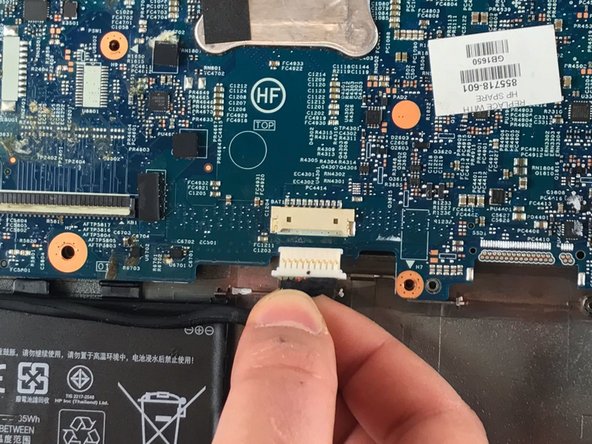
- Disconnect the 3 bundle cable connectors by gently gripping the cable wires and pulling outwards.
- Be sure to grip each of the cables equally so no single cable is overly strained.
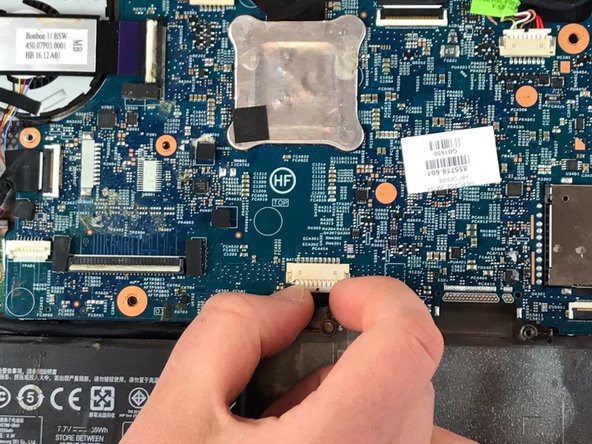
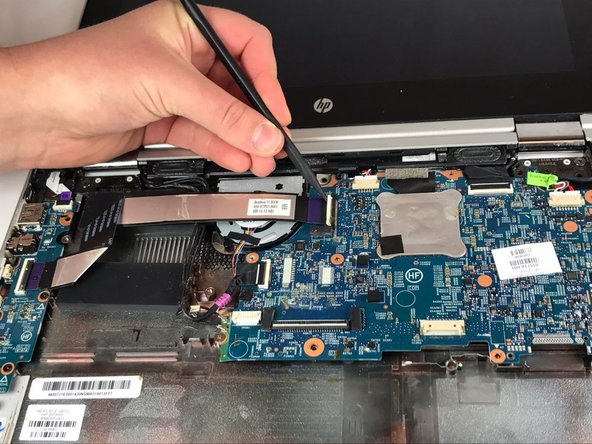
- Disconnect the 2 cable ribbons with the Heavy-Duty Spudger.
- Gently flip up the white plastic lock connecting the ribbon cable to the motherboard.
- Use the purple plastic tab on the ribbon cable to disconnect the ribbon cable from the lock.
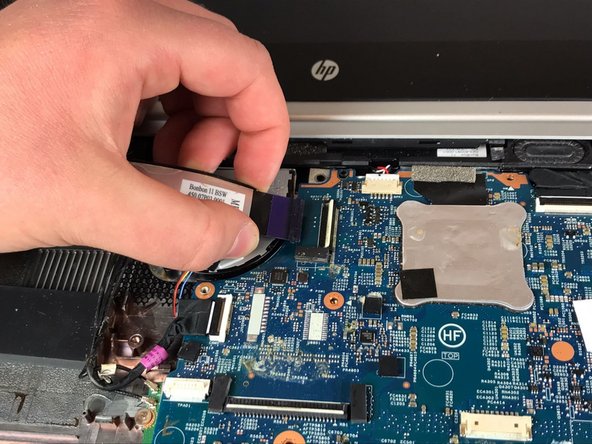
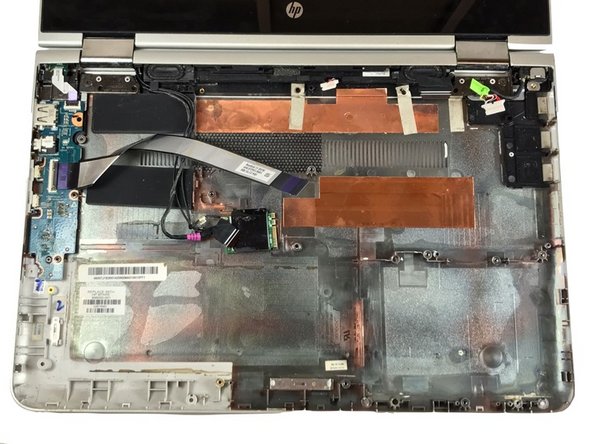
- Gently lift up the motherboard to disconnect it from the computer.